Follow these steps to install the NCR Counterpoint Service Pack in a Multi-Site environment:
On your Hub server, download the current Service Pack (cpsp84.exe.zip) from the NCR Counterpoint Updates page of the Counterpoint User Portal (userportal.counterpointpos.com/support/software_cpsql.htm) and extract the archive.
![]() You must be a registered
CSS subscriber to access the Counterpoint User Portal.
You must be a registered
CSS subscriber to access the Counterpoint User Portal.
Browse to the directory to which you extracted the Service Pack and double-click cpsp84.exe to start the Service Pack installer.
Click Next on the Welcome dialog.
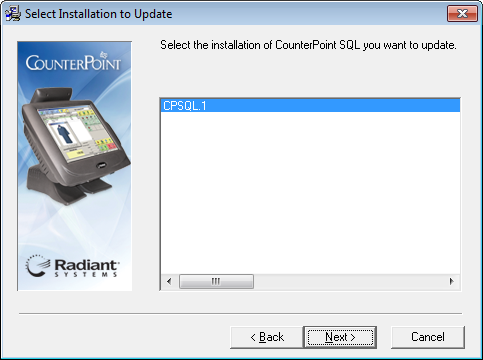
On the Select Installation to Update dialog, select the Counterpoint installation (e.g., CPSQL.1) to which you want to apply the Service Pack and click Next.
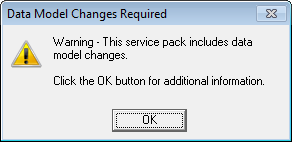
If the Service Pack includes data model changes, a message appears.
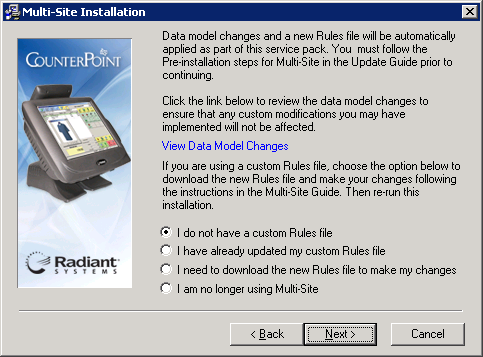
Click OK to proceed to the Multi-Site Installation dialog, which explains that the Service Pack will automatically update your Counterpoint database schema and apply a new replication rules file.
Click the View Data Model Changes link to review the views, tables, triggers, and stored procedures that will be affected by the Service Pack. If you are applying the Service Pack to a customized Counterpoint system, carefully review these data model changes and take the appropriate steps to ensure that they will not adversely affect your customizations.
Typically, database schema changes you have made will be retained during the Service Pack installation, because those changes are part of the database. However, you must take the appropriate steps to ensure that your customizations will continue to function after the update. For example, if you added a trigger that depends on a particular column and that column is removed by the Service Pack, your trigger will not work.
If you are using custom replication rules, you must download the current replication rules file and update it to include the necessary modifications to incorporate your custom tables and columns.
Select one of the following options from the Multi-Site Installation dialog:
- I do not have a custom Rules file - Select this option if you are not using custom replication rules, and then click Next.
- I have already updated my custom Rules file - Select this option if you have already downloaded the current replication rules file and applied the necessary custom modifications to it, and then click Next.
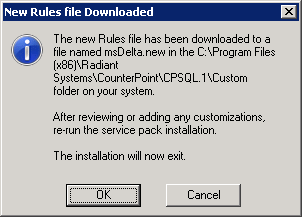
- I need to download the new Rules file to make my changes - Select this option to download the current replication rules file (msDelta.new) to the \Custom subdirectory of your Counterpoint installation directory (e.g., C:\Program Files\Radiant Systems\Counterpoint\CPSQL.1).
When the download is complete, the New Rules file Downloaded dialog appears. Click OK to close the Service Pack installer, and then follow the steps in the Multi-Site online help to include your custom tables and columns in the new rules file. When you have updated the rules file to include your customizations, start the Service Pack installer again.
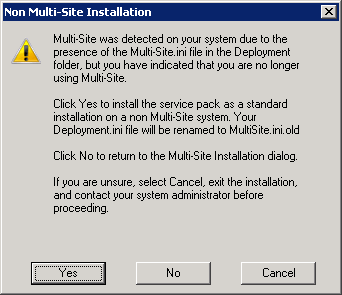
- I am no longer using Multi-Site - Select this option if you are no longer using the Multi-Site Option, and then click Next. The Non Multi-Site Installation dialog appears, allowing you to confirm that you are no longer using Multi-Site.
Click Yes to perform a standard installation of the Service Pack on your server and rename your Deployment.ini file to MultiSite.ini.old.
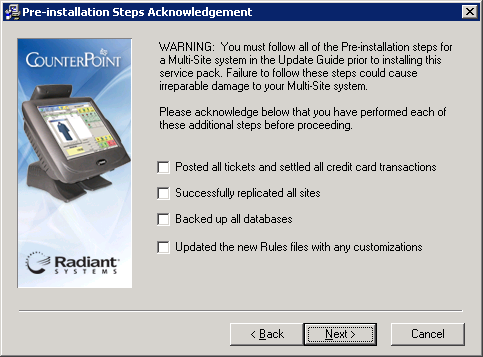
The Pre-installation Steps Acknowledgement dialog appears, requiring you to confirm that you have completed all necessary Multi-Site pre-update steps before proceeding with the Service Pack installation.
If you have not already done so, post tickets and settle credit card transactions at each of your sites, replicate each of your Remote databases with the Hub, and then back up your Hub and Remote databases, as outlined in the Multi-Site pre-update steps in the NCR Counterpoint Update Guide.
As you complete each of these pre-update steps, select the corresponding check box on the Pre-installation Steps Acknowledgement dialog. When you have completed all of the pre-update steps, click Next to proceed with the Service Pack installation.
Click Next on the Start Installation dialog to install the NCR Counterpoint Service Pack, update your Counterpoint database to the current schema, and apply the updated replication rules.
From the Installation Complete dialog, select the View Service Pack Log check box if you would like to review the issues that have been addressed in the Service Pack, and then click Finish.
![]() If you are using Offline
Ticket Entry, run the Service Pack installer on each of your Always
Offline workstations. Non-offline and Sometimes
Offline workstations will be updated automatically the next time
you start Counterpoint on them.
If you are using Offline
Ticket Entry, run the Service Pack installer on each of your Always
Offline workstations. Non-offline and Sometimes
Offline workstations will be updated automatically the next time
you start Counterpoint on them.